Hyperdiv#
To deploy a Hyperdiv application in Ploomber Cloud you need:
A Ploomber Cloud account
A
DockerfileYour code
Dockerfile#
You need to provide a Dockerfile. You can use the Dockerfile in this example to get started. The example contains the minimal steps needed for deploying a basic app. You will need to modify it to install any additional dependencies and copy your code into the Docker image.
FROM python:3.11

# Copy the app code into the image
COPY app.py app.py
# Install Hyperdiv
RUN pip install hyperdiv

# Put Hyperdiv in production mode,
# Running on 0.0.0.0:80
ENV HD_PRODUCTION=1
ENV HD_HOST=0.0.0.0
ENV HD_PORT=80

# Start the app
ENTRYPOINT ["python", "app.py"]
Testing locally#
To test your app, you can use docker locally:
# build the docker image
docker build . -t hyperdiv

# run it
docker run -p 5000:80 hyperdiv
Now, open http://0.0.0.0:5000/ to see your app.
Deploy#
Create a zip file containing all the relevant files. For example:
zip my-app.zip Dockerfile app.py
This will create a zip file my-app.zip containing the files Dockerfile and app.py.
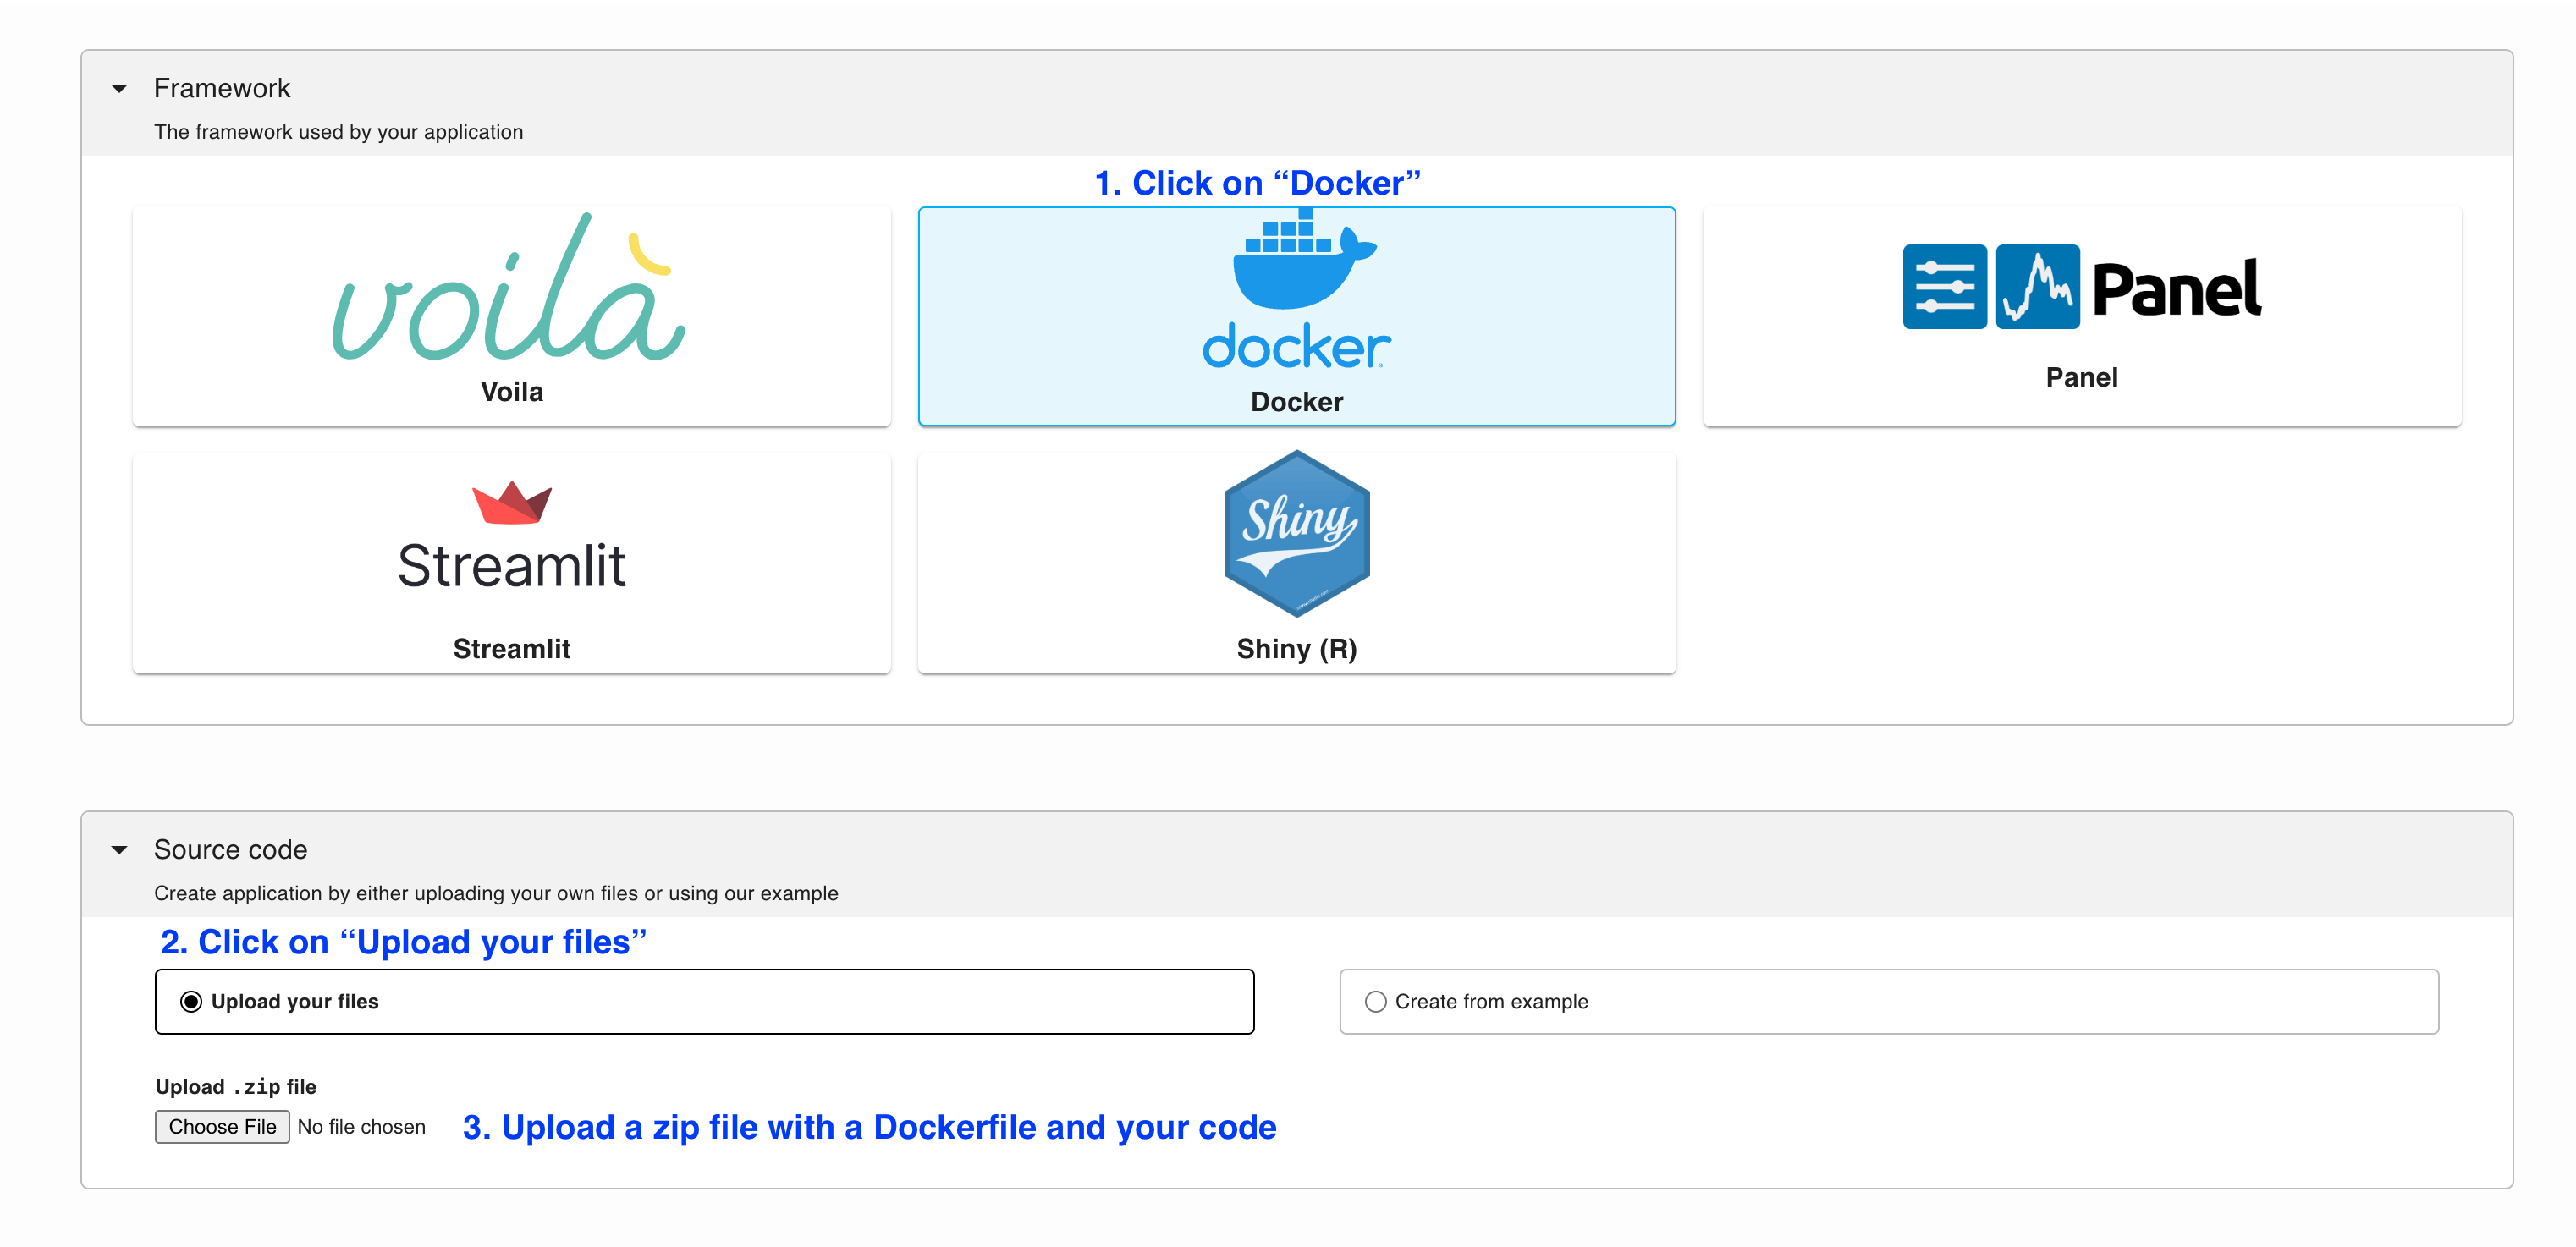
To deploy a Hyperdiv app from the deployment menu, follow these instructions:
Tip
To ensure your app doesn’t break on re-deployments, pin your dependencies.
Environment Variables#
In the example above, Hyperdiv’s environment variables are set directly in the Dockerfile. Optionally, you can set these environment variables in the Ploomber UI when you configure a deployment.
The relevant environment variables are:
HD_PORT: The port on which to run the app within the container. (Should be80.)HD_HOST: The hostname on which to run the app within the container. (Should be0.0.0.0.)HD_PRODUCTION: Set it to1to enable production mode.