MLflow#
Important
If you’re on a free account, always back up your work because your app can be terminated if inactive. If you need MLflow deployed with production settings, contact us contact@ploomber.io
Deploy from the menu
To deploy MLflow, create an account.
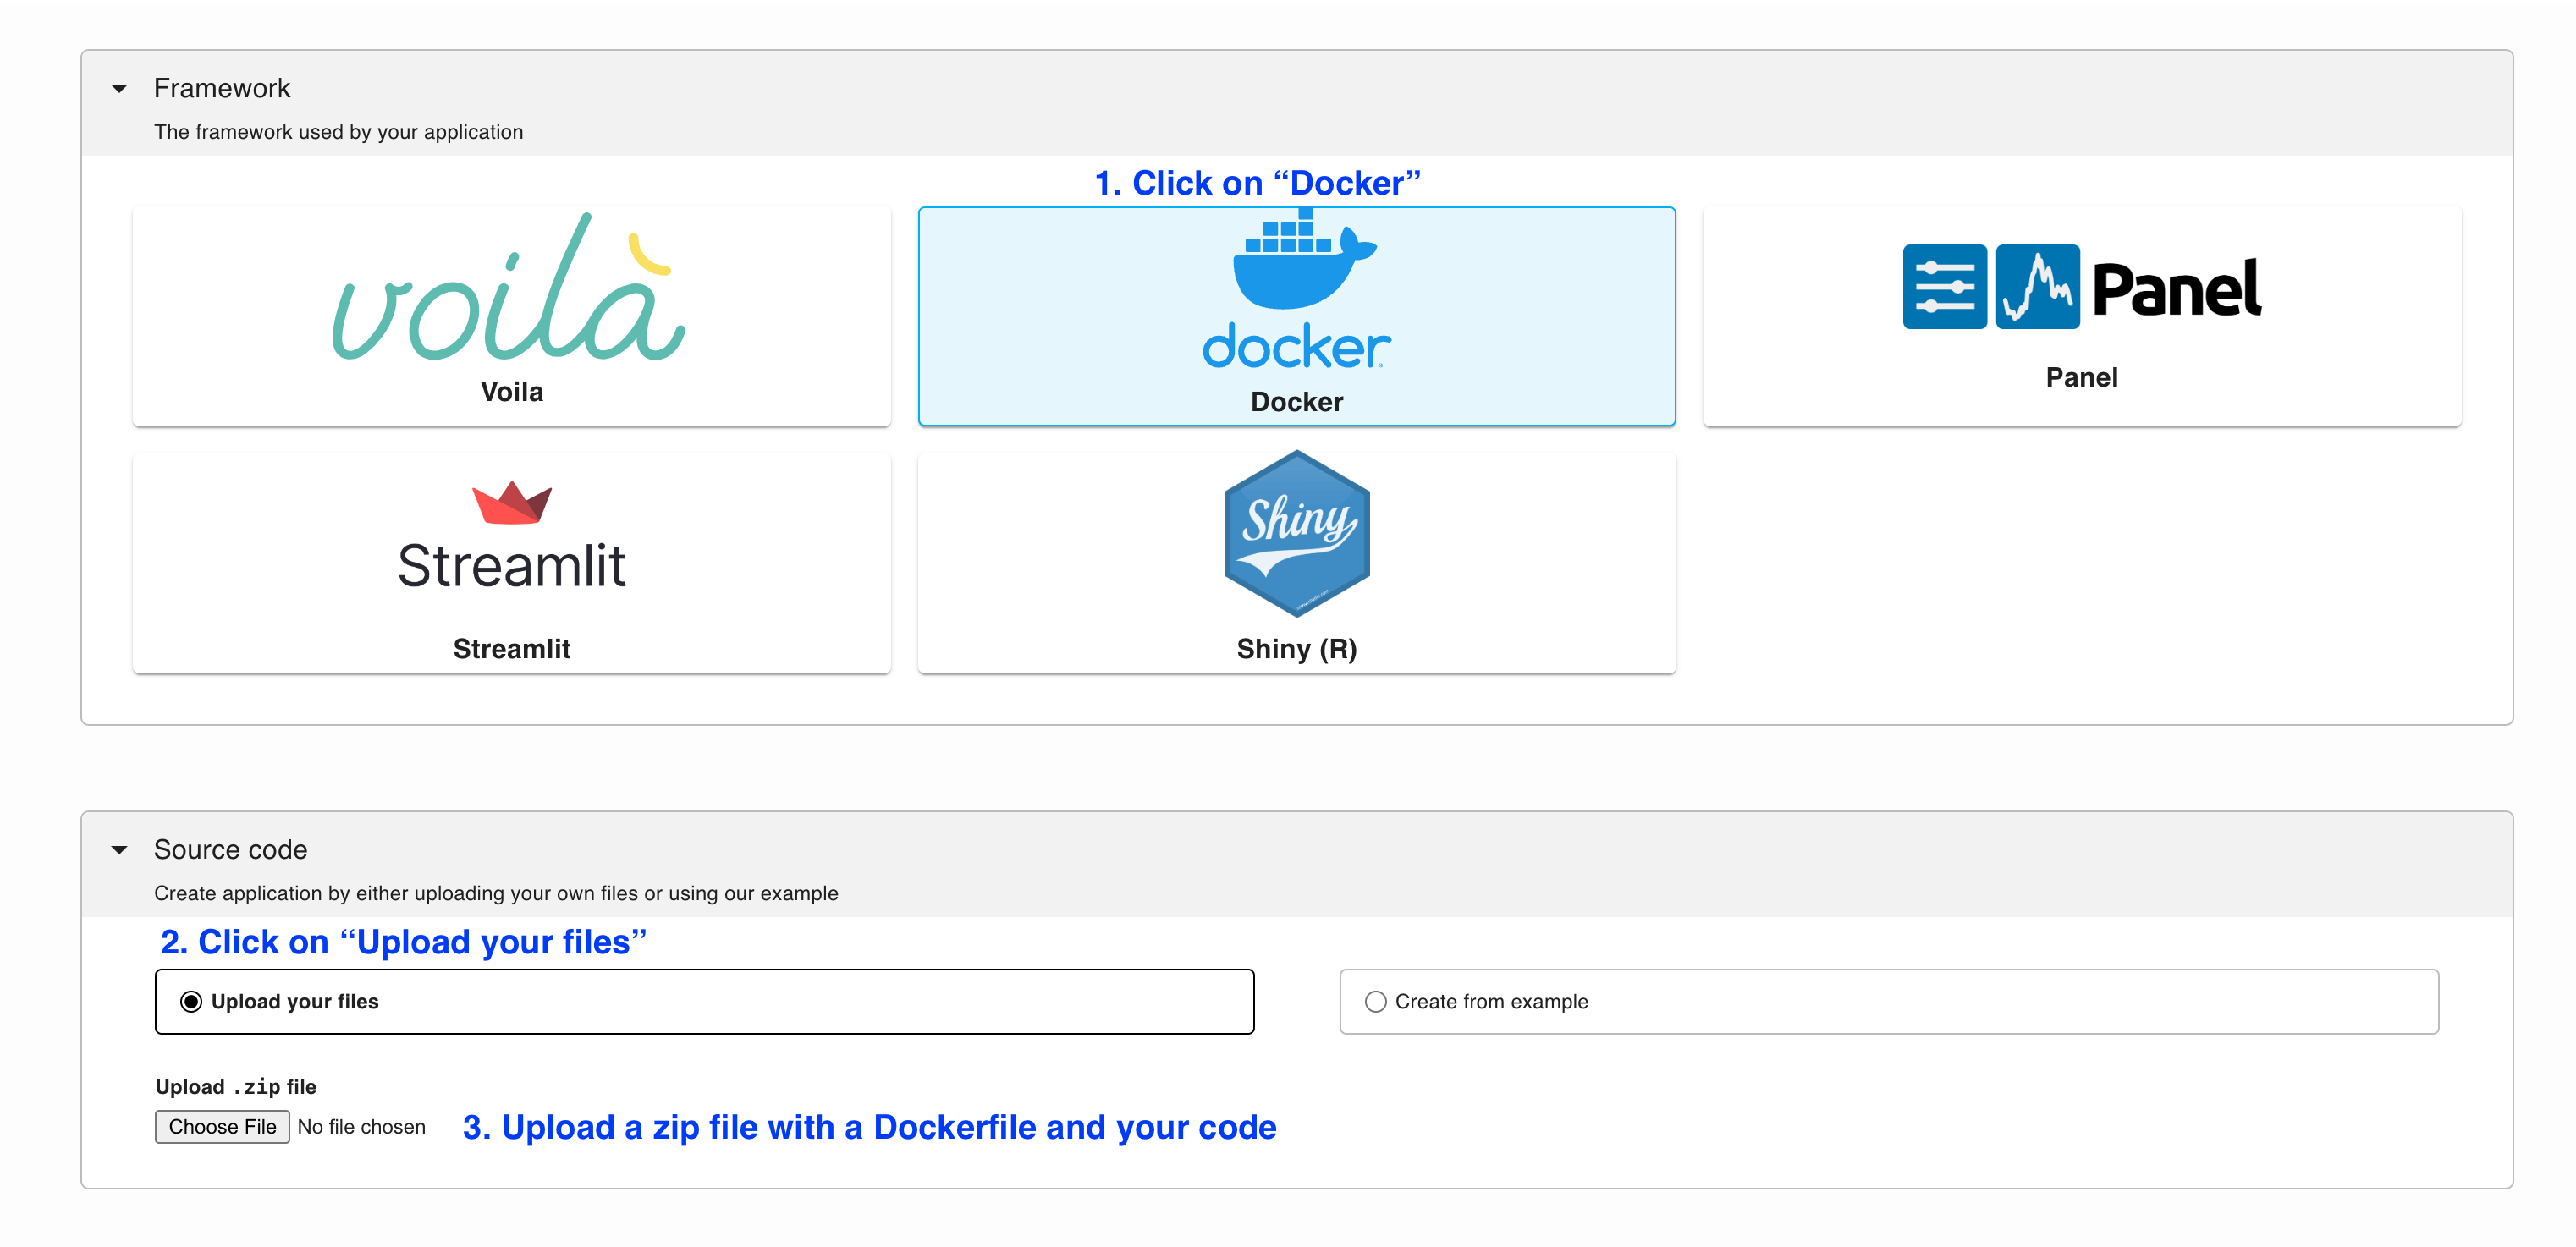
Then, download the Dockerfile from the
example, create a .zip file and deploy it using the Docker option:
To download and deploy MLflow start by installing Ploomber Cloud and setting your API key:
pip install ploomber-cloud
ploomber-cloud key YOUR-KEY
Tip
If you don’t have an API key yet, follow the instructions here.
Now, download the MLflow example. It will prompt you for a location to download the app. To download in the current directory, just press enter.
ploomber-cloud examples docker/mlflow
You should see a confirmation with instructions on deploying your app. Now, navigate to your application:
cd location-you-entered/mlflow/
Deploy from the CLI
Initialize and deploy your app with:
ploomber-cloud init
ploomber-cloud deploy --watch
You can view the deployed application by logging in to your Ploomber Cloud account.
Once the deployment finishes, open the app by clicking on VIEW APPLICATION, if all
went well you’ll be prompted for a user and a password:
User: admin
Password: password
Changing the default password#
For safety, let’s change the credentials. Install the requests package:
pip install requests
And run the following in a Python session:
import requests
from getpass import getpass

host = input("Enter your {id}.ploomberapp.io URL: ")
password_new = getpass("Enter new password:")

response = requests.patch(
    f"{host}/api/2.0/mlflow/users/update-password",
    auth=("admin", "password"),
    json={"username": "admin", "password": password_new},
)

response.raise_for_status()

print("Your new password is:", password_new)
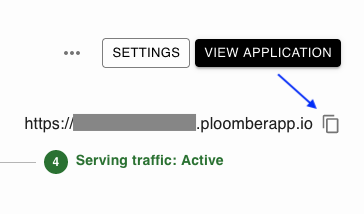
You’ll be prompted for your MLflow host (e.g., something.ploomberapp.io), you can
get this from the Ploomber UI:
Then, enter the new password.
To confirm that the password was changed, open the MLflow dashboard again and enter the new password.
Tracking experiments#
To start tracking experiments, install mlflow locally:
pip install mlflow
Set your credentials as environment variables:
export MLFLOW_TRACKING_USERNAME=admin
export MLFLOW_TRACKING_PASSWORD=yourpassword
And run the following (replace the set_tracking_uri call with your host!):
import mlflow
mlflow.set_tracking_uri(uri="https://someid.ploomberapp.io")

mlflow.set_experiment("first-experiment")

with mlflow.start_run():
    mlflow.log_params({"a": 21, "b": 21})
    mlflow.log_metric("accuracy", 0.91)
If all goes well, you’ll see:
2024/03/12 19:44:39 INFO mlflow.tracking.fluent: Experiment with name 'first-experiment' does not exist. Creating a new experiment.
And the experiment will be visible from MLflow’s dashboard.